1-1: In order to avoid the possibility of electrical shock and any accidental damage to the unit, make sure that the power switch is turned OFF and the power cord is unplugged. Also disconnect any MIDI, audio or foot controller cables connected to the unit.
1-2: Place the DX7 on a flat, open table.
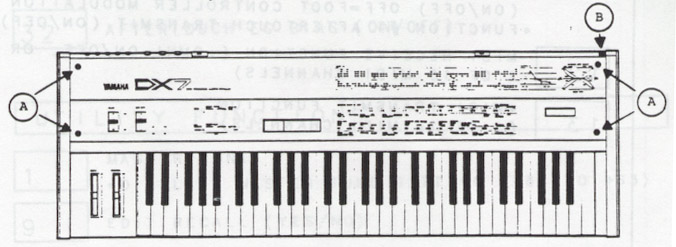
1-3: Remove the 5 Phillips-head screws that secure the DX7's front control panel as shown in the image below. It should also be noted that the screw designated with the letter "B" (located next to the power switch) is shorter than the other screws. Please make sure that this screw is used at the same location when securing the front panel after installation of the RE! MkI is complete.
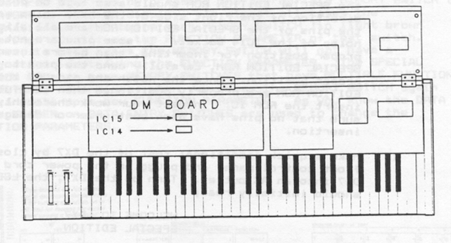
1-4: Carefully lift up the edge of the DX7's front control panel, closest to the keyboard and open it all the way until it is resting against the back edge of the DX7 case as shown: