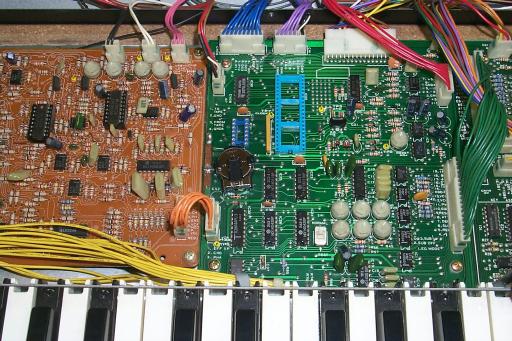
8-1: Verify all seven cables are reconnected to their respective positions. Use the above image as a reference, though note that the wire colors vary from unit to unit.
8-2: Re-solder the black ground wire to its solder area next to the battery on the left edge of the board.
8-3: Make a final visual check of the connections and verify that no clipped component leads, flecks of solder or other debris that can cause eletrical shorts is present.
8-4: Verify that CPU IC22 and 74LS08 IC31 are installed in their sockets with the "pin 1" notch facing toward the keyboard. Make sure no pins got folded up under the sockets.
9-2: The big moment! Plug the power cord in to a wall socket and turn the power to the unit on. Make sure the "tape enable" switch is set to DISABLE. After a few seconds, the LEDs in the patch select buttons should go dark except for bank A and program 1. If more than one bank LED or program LED remains lit, then one or more of the repaired traces is in need of further checking to locate the problem. If all the LEDs are on, then the CPU IC22 may be bad. Email me if you need a replacement CPU.
9-3: If things look good so far, test each bank and program button. Their corresponding LEDs should light as you press each button. Also test the "manual" button. If these 13 LEDs are working normally then the KLM-367 is probably in no further need of repair. Note that if you try to play any of the patches they don't sound like much. This is due to the fact that the patch memory lost the data when the old battery weakened to the point it could no longer support the data-retention of the memory chip. The new battery is supplying sufficient voltage, but the patch memory needs to be reprogrammed. If you saved your programs to a tape, simply reload them. Otherwise you will have to manually set patches and save them using the front panel controls.
9-4: Push the "manual" button and set the machine to play some notes. Test that each control does what it is supposed to do and doesn't sound "scratchy". The knob controls should all smoothly change their settings, with no popping or sudden volume or pitch/timbre changes.
9-5: At this point, you can turn off the power and reinstall the four screws on the bottom-rear of the unit, and then the four upper screws--two at either end of the unit.